Monday 1 October 2018

Laser Cutting at NYP's Makerspace

20190317_094220

Untitled

The laser cutter at school's Makerspace has been a godsend since I discovered how easy it was to drop by and cut my materials. Perhaps because I wanted to compensate for previous times where I've gotten others to fabricate work for me - whenever I asked someone else to fabricate things for me I often felt I had lost the chance to handle the material directly as a result, to completely understand how to work with that material or how to make these things by hand. Although much of it could be 'subbed' out to other contractors, I feel there is value in understanding the process. So for this PYT project I decided I had to build all my acrylic things by myself this time around! And this meant many hours spent encamped in the Makerspace's controlled access room...

Manual Focus for Laser Cutters


There's this little tool for focusing the laser cutter properly.

Untitled

You drop it into the head of the laser cutter like this.

Untitled

And then adjust the level using the up and down buttons.

Untitled

The world of laser cutting awaits! All you need to use is Adobe Illustrator to make your cut/etching file.

Where to find Materials for Laser Cutting in Singapore


The most cost efficient place to buy acrylic is probably Dama, with their FREE GIFT and SNACKS WHILST YOU WAIT COUNTER. Dama covers all the bases, from Acrylic to Polycarbonate and other interesting sheet materials. The default size of most of the 3mm cast acrylic sheet is 1220mm x 1830mm (about $48 + $1 cutting fee) which you can ask to have cut down into 4 sheets of 610mm x 915mm sheets which will perfectly fit larger laser cutters such as the GLS Spirit at NYP's Makerspace!

However, for everyday purposes, acrylic and MDF is also available at Artfriend at a premium. Out of all the available units, I found that 18x24in is a size that I can easily transport around when quickly buying sheet material. For random everyday projects I find this sheet material from Artfriend works well enough.

Untitled

Untitled


Don't skimp when buying the acrylic glue. Buy the green bottle of liquid quartz for $5.35. The one with the red cap dries with clouding which you do not want. But the more expensive liquid quartz acrylic glue bonds crystal clear.

Easy Laser-cut Builds


Use Makercase to instantly generate simple boxes like these.

Untitled

20190317_094220

Untitled

Sunday 30 September 2018

DIY Mannequin Tripod Mounts

How does one mount Mannequin heads on a standard tripod without buying an expensive specialised mannequin mount? Who invented this infernal mounts which don't fit any standard kinds of tripods? I never quite figured out what was the normal way so I made up my own way of producing a mount using tinfoil, hot water, and polymorph - a kind of thermoplastic which often has a material finish that doesn't work for the exterior of a project, but definitely works for an internal part which no one is going to ever look at.

Untitled

Here is this offending mannequin mount hole that I can't seem to find a way to fit on the tripod.

Untitled

Using tin foil I covered the inside of the hole so that my thermoplastic would not accidentally bond to the plastic of the mannequin head itself

Untitled

I bought a bag of assorted tripod screws / adapters / converters online. There were 30 of these mixed screws in a bag and they are always handy to have!

Untitled

Next I just heated up the polymorph with hot water. I bought a few bags of these several years ago, this particular thermoplastic fuses at 60 degrees celsius making it easy to handle and mould into the form you want after it is immersed in boiling water for a short while.

Untitled

The tripod screw is embedded into the thermoplastic in the hole.

Untitled

And a perfectly functional, custom-made mannequin mount for a standard tripod is made from things found around the house!

Saturday 29 September 2018

CCTV cameras on camera

Untitled

Look Ma, the camera is on camera! Here is a test image of the field monitor with the cctv camera I got for my works in the PYT show. It seems that surveillance or CCTV cameras generally fall into two lots - covert/hidden cameras vs OBVIOUS CAMERAS (because sometimes knowing you're being watched is all you need, and the actual watching is less important for the purpose of 'surveillance').


Sim Lim Tower has a load of fake CCTV cameras mixed up with their real CCTV cameras. There are even ones with motion detection with cameras that follow you when you move.


At the 24hr Mustafa Centre there are pallets full of these $5 fake realistic cameras which look just like the real shells and even have a little red LED "activation light" for realism. (In my house I sometimes get mixed up between my collection of REAL CCTVs cameras and the fake CCTVs... I mean, the manufacturers who are producing the plastic shells for CCTV camera housings must be doing a great sideline in these... maybe it is even their mainline....)

But I wanted to find a working camera that was a patently obvious CCTV camera. At first I searched for anything from high end blackmagic studio cameras (out of budget) to even regular consumer webcams (logitech has some pretty decent ones) and the choices seemed honestly bewildering. Eventually I decided on this China-made Vanxse CCTV Camera with varifocal lenses because to me it looked like the most "generic" CCTV camera.


True enough, on the week of the setup I saw this picture on social media (Yes I browse it once in a while although I don't post anything personal on it) and I don't even watch Netflix or Maniac (probably never will!!!!) but when I saw this picture I was like... I KNOW THAT CAMERA FROM SOMEWHERE.... because I've been staring at it the back end of this equipment very intently recently.


Ho ho ho! I think this here is affirmation that the equipment I have chosen will likely be visually recognised by general audiences as a surveillance camera!

It costs USD50 (About SGD66 from Amazon) and to get a HDMI output for it you just need a BNC Adaptor + Yellow composite video cable + standard composite AV to HDMI converter. Its quite a standard 1/3" camera with a CS type lens mount so you can buy different lenses for it. The camera itself uses as Sony Effio-E Imaging Sensor / processor - "Effio" stands for "Enhanced Features and Fine Image Processor". This Effio-E is supposed to be a Sony signal processor which is able to capture high resolution and good colour reproduction (as well as having a high signal-to-noise ratio).

Untitled

When I bought the camera I realised it required a BNC connector (Bayonet Neill–Concelman connector), which can be cheaply bought so you can get the AV video output. Based on the design of the camera's ports at the back, there is actually very little space left to execute the quarter turn required to lock the BNC coupling nut, and when you are trying to plug in your generic 12V adaptor then you really need to squeeze everything in together much harder than you would imagine. I was reading that the BNC connector was used in many early computer networks (eg ARCnet) and that there were also specialist tools devised for inserting these tough nuts in very small spaces - they often appeared on tightly packed boards which left no space for fat human fingers to turn the coupling nut on the connector.


RCA is an analog format so the final image when converted to a digital HDMI signal with the HDMI converter the video image will still tend to be grainy visually. Since I am producing images of landscape through these feeds, I'm actually okay with the grain as it lends to the overall visual effect.

Untitled

Untitled

Furthermore getting a cctv camera means its also produces good images in "total darkness" especially when combined with infrared lights that are completely invisible to the human eye!


What am I building with all this?


A terrifying closed circuit contraption! (There are other cameras in the work too!) Come and see it in person! Soil works was produced for the President's Young Talents 2018 show and is on now until 27 Jan 2019.


8Q @ Singapore Art Museum
8 Queen St, Singapore 188535
Gallery 3.12 (Level 3)
4 Oct 2018 - 27 Jan 2019

Friday 28 September 2018

Landscape Renderings: Should the light come from the left or right?


In a landscape painting, where should the light come from? should it come from the left or the right? To make a generalisation, it seems that people prefer to have it lit from the top-left, and maybe it seems more natural to come from the left because of the dominance of right-handness. As a right-handed person, my tendency is also to look to the left first rather than the right; I lean on my right hand when writing and look to the top left of my screen first. Likewise I find that as a right handed person my distance estimation in a mirror is better when the mirror is to the left rather than to the right. Most digital canvases start from the top left.

The convention for most maps is also for features or relief to be shading with lighting coming from the top-left or left. In this example of Erwin Raisz's topographical symbols, you will see the mountains shaded with light coming from the left.


Even the teeny tiny trees have their shadows cast as if they were lit from the left.


In my first render, I set the sun on the left of the scene, copying the lighting from the illustration on the back of the $10 note. This was the only way to achieve the diagonal shadows on the building features as depicted on the $10 note.


However, when I positioned the light this way from the left (as adhering to conventions), I didn't feel the lighting on the overall landscape was working even though it allowed me to achieve the same lighting on the illustration on the $10 note. Then I thought that perhaps the only reason the illustration was drawn with the light coming from the left was because of CONVENTIONS DICTATING THAT LIGHT SHOULD COME FROM THE LEFT. I also didn't like doing a 'ghostly' red to match the illustration on the note. That was weird and incongruous. No, I wanted the building hewn out of the same material. (Also the camera field-of-vision was another thing which distorted my building although I had followed its design closely in the render).


And thus the final lighting looks like this... the light comes from the right because I don't need my landscape to feel natural or conventional and to be honest I just like it when it comes from the right.


Another thing worth noting when you are printing large backdrops is that most backdrop stands that you can find on the market will do 10ft. There's a reason for this - most printers can only print on 10ft material. Furthermore, even if you get a 12ft pole, the long poles will sag in the middle due to the sheer weight of the item. So if I printed my work all over again, I would not do 12ft again because it is TOO HUGE.


Come see the work I produced for the President's Young Talents 2018 show!

8Q @ Singapore Art Museum
8 Queen St, Singapore 188535
Gallery 3.12 (Level 3)
4 Oct 2018 - 27 Jan 2019

Thursday 27 September 2018

Anodised Aesthetic and Cutting aluminium profiles at home with a small hacksaw

Untitled

Can you cut small aluminium profiles / Maker Beams at home using simple tools? The answer is YES YOU CAN! I actually have never cut metal for a project previously and it sounds a bit intimidating but I decided it was high time to build with aluminium - and to use it to build the frame for my own sand turning cctv contraption.


Apple's Anodized Product Design Aesthetic

Why aluminium? It has excellent strength and resistance for its weight and is corrosion resistant even in moist conditions. Its super light yet solid and would be totally solid even if I had motors turning a 600g box inside it. Possibly you could say I was influenced by the finishing of all the products that I'm touching on a daily basis... I spend hours each day touching the anodised aluminium of the macbook or tablets with similar finishes. So many products use anodised aluminium as a functional and aesthetic finish. So why not use extruded aluminium profiles to construct the exterior rig - surely that would be solidly functional and aesthetic.

I bought the Makerbeam XL kit (S$219) and a bunch of 100cm Makerbeam XL rods (S$15.50 each from SGbotic) and I needed to cut a few more down to my custom sizes. Previously I had built some things with much cheaper aluminum profiles but not all of them had this perfect finish, the corner cubes, and this slimness (15mm) suited the work well. The pre-cut pieces made it super fast to build a first prototype, and the longer pieces provided flexibility to cut and add on custom lengths of support.

Untitled

All you need is a small hand saw, clamps, some lubricant and your kitchen table. And yes, even for those of you of ridiculously weak muscular strength, I promise that your cut rods will be of an acceptable standard. (I have zero arm muscle btw. I can't even do a single pull up.)


All that you'll need for this endeavour is:
A small hacksaw with a blade
A clamp
Spare bit of wood (for clamping)
File
Can of Lubricant

And some tissues to clean up the puddle of grease and aluminium powder you're about to splatter on your kitchen floor, you dirty animal!

Hacksaws are basically those C-shaped frames which hold a blade using tension. You can get a cheapie (but solid) Lenox one for like $12.60, and the blades for about $2. There are plastic ones that go for even less! The blades come with a number, something like 18TPI or 24TPI (also written on blades as 18T or 24T). This stands for Teeth per inch. I happened to use the 24TPI one that was already in this random hacksaw I found. The logic behind this is that the lower TPI should be used for thicker and heavier metal. There's apparently a whole science behind the thickness of material vs the TPI that you can read up on here. But obviously in all these cases its not just any random metal, but any kind of machinable metal (such as aluminium)


With a little sawing, the metal will bend to your will and you will have your profile lengths customised for your project! All you need now is to tap screw threads into the ends and you've got a perfectly usable part. If you are using the Makerbeam cubes they will very easily hide any rough cuts, or simply sand off the edges if they are going to be exposed.

Untitled

Untitled

Untitled

Untitled


You can see this work in motion at the President's Young Talents 2018 show!

8Q @ Singapore Art Museum
8 Queen St, Singapore 188535
Gallery 3.12 (Level 3)
4 Oct 2018 - 27 Jan 2019

Wednesday 26 September 2018

Using Paint and Plastics to Make Realistic Fake Cow Grass

Untitled

A few years ago I wrote a series of short stories, one of which was about a social contract in which people were allowed to remain in an area if they totally blended in by wearing a camouflage suit. It was based on this story that I decided to make these red-soil-with-cow-grass ghillie suits:

A HOME WITHOUT A SHELTER

In this city, all private land parcels exceeding the specified size must allocate at least 10% of green spaces on their land as a "permitted camouflage zone". People who wish to use parts of these private gardens for their own leisure are legally permitted to do so, so long as they are in camouflage. Special camouflage suits are manufactured and sold to suit every type of urban space. Members of the public blend seamlessly into the private gardens, private landowners are unable to see the public in their parks — the suits rendering them invisible on first glance.

Some entrepreneurial individuals have been trawling through the streets collecting soil and plant material, sewing the organic material into suits for would-be park goers. In particular, homeless people have been taking the most advantage of this scheme, devising the most ingenious ways of producing a camouflage suit at almost no cost, and becoming virtually invisible within some of these parks. Many people in this city have mastered the fine art of blending in and remaining unseen whilst still in plain view.

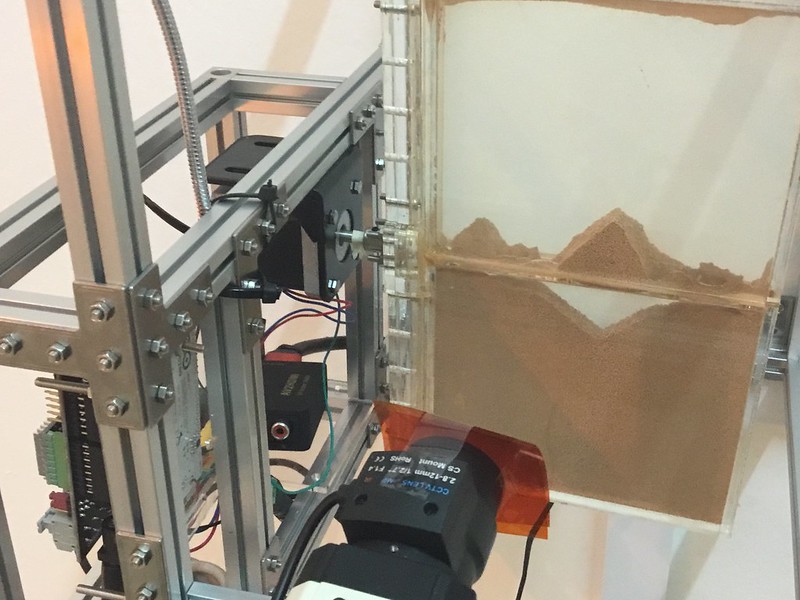
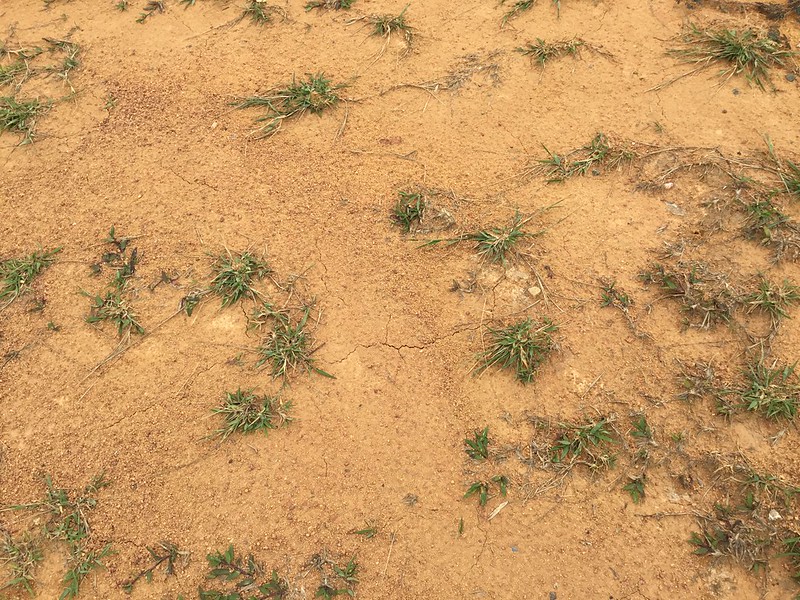
It turns out that a clod of recently deposited soil isn't really a realistic clod of soil unless there is a bit of grass poking out of it. The mound of soil must have grass because soil is the surface through which things intersect (light, buildings erupt from its surface, shards of greenery, etc), and without the eruption of grass from the surface it is hard to appreciate the continuity of the surface.

Untitled
Like this...

So it turned out that my attempts to make a landscape work soon became a totally ridiculous painstaking endeavour to produce the most realistic cow grass by hand in artisanal small batches......


When I began conceptualising this new work, I originally intended to digitally print everything, but then as things turned out, I wasn't quite satisfied with the quality of the digital colour once it was printed on fabric. Often digital print on textile has the odd, dullened sheen of ink deposited on the surface, dependent very much on the base that it is printed on. Mainly the fabric texture getting in the way. But colour is so important in this. As someone who has done a fair bit of digital painting, I consider myself quite knowledgeable about how digital colour or colour on screen works, but paint has always been a whole other territory. I don't know so much about all the different mediums, or why there are so many different types of whites available in the shops, or why I should buy one brand of paint over another. So it wasn't my first choice to work directly with colour or paint... its not a medium which I'm 100% comfortable with...


Fortunately, what I found is that one's understanding of digital colour addition can be easily translated into real-life paint colour addition. And as it turns out - boy oh boy do I enjoy painting! I didn't even think I would enjoy it so much! I don't want to just paint abstract or random things, but I want to gain total mastery over the medium. To me, if I haven't become good or precise enough to paint something ultra photorealistic at the snap of a finger, then I don't think I could allow myself to generate any ol' random paintings just yet. After this project is done, I think i'd like to try to master photorealistic painting. You know, obsessively painting images of thin-film interference or iridescence or something totally ridiculous like that. (But since I'm working towards a deadline, I'll leave my idle dreams of painting images of tempered metal for another time...)


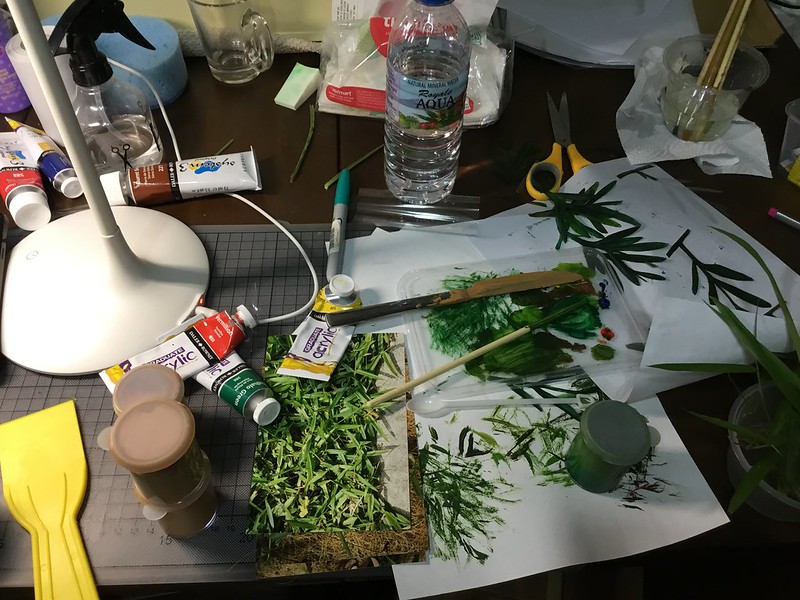
To the left, the paint, and to the right, the colour sample (some actual soil collected from outside)

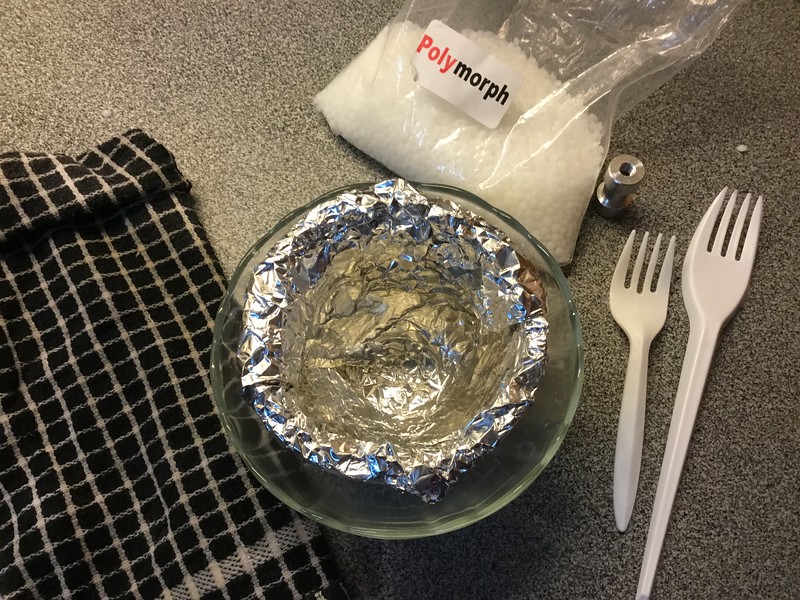
It was easy to obtain an accurate colour sample for the red soil I wanted because I just kept a bowl of soil in the house for reference. However, I realised that the red of the soil was not necessarily recognisable as a familiar sight to Singaporeans - unless accompanied by a sparse smattering of grass, in particular, the grass known as "Axonopus compressus" or "cow grass". But since grass is living material and not mineral, keeping a colour sample was harder.

Untitled

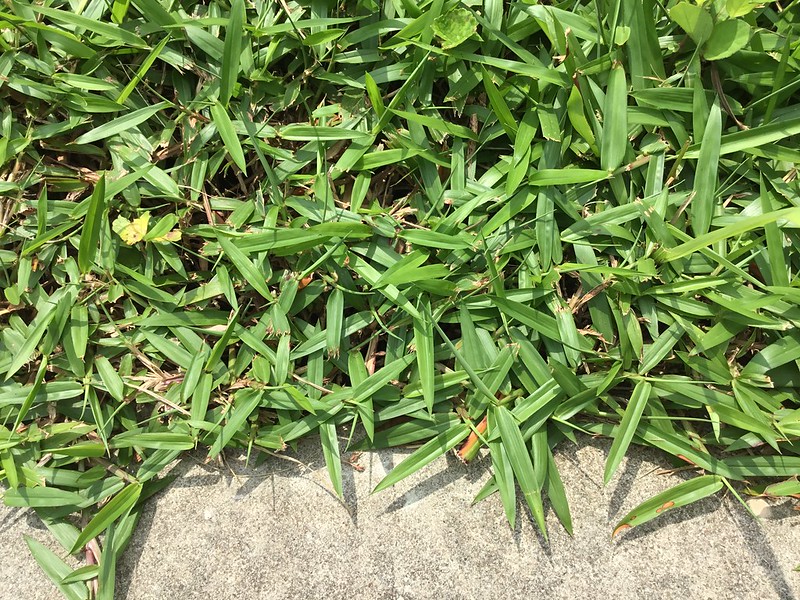
Here was the grass in situ... (on a grassy mound in Buangkok)


First attempts at making a colour reference failed because I am a monster and I actually tried to laminate the fresh green grass to preserve. Not a great idea because grass obviously changes colour when COOKED, like any other plant or vegetable.


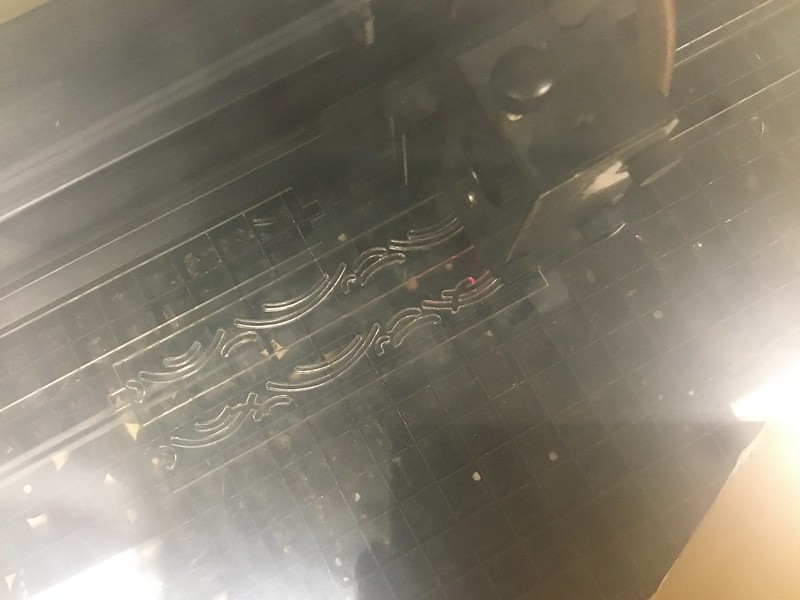
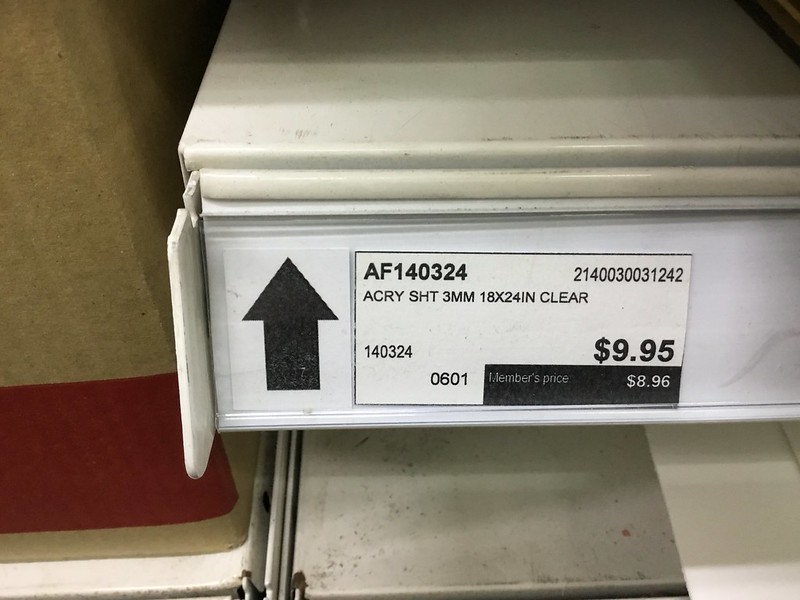
I iteratively improved the colour until it was as close as possible to the real thing. I don't really like painting on paper. But I really LOVE painting on a transparent plastic medium. The ease of painting on smooth plastic, the way you can overlay it onto other things. I've tried cellulose acetate (aka OHP transparency) but that is a medium known to be vulnerable to yellowing and warping over time, breaking down into acetic acid or the plasticisers migrating outwards to the surface leaving a weird white powdery deposit. Now I'm trying Dura-Lar film which is supposed to be a mix between Acetate and Mylar - supposedly archival grade material which is partly made out of the resin Polyethylene Terephthalate (PET).


Finally, here is the colour reference I made for the plastic grass that I seem to be making in a very tedious fashion BECAUSE I HAVE TO DO THINGS THE HARD WAY.

Untitled

Untitled

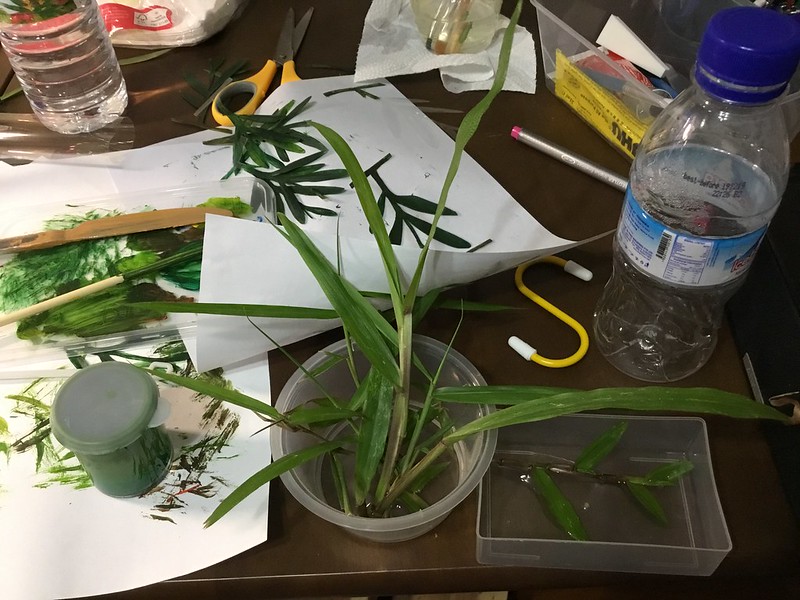
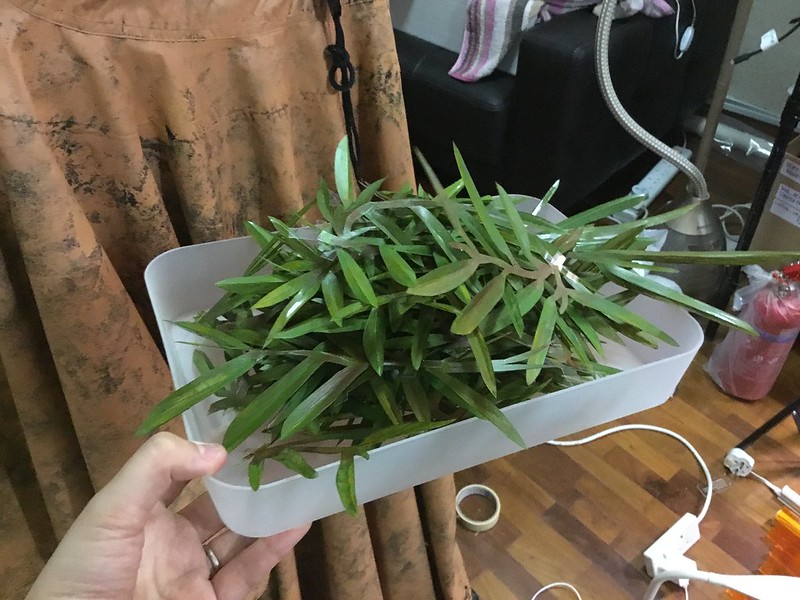
I ended up putting some of the grass (that I hadn't inadvertently cooked through lamination) into a dish of water and now it appears I am also growing grass at home. Maybe I will put it in the snail tank, so the snails can feed on it, and then the cycle will be complete?...

Untitled

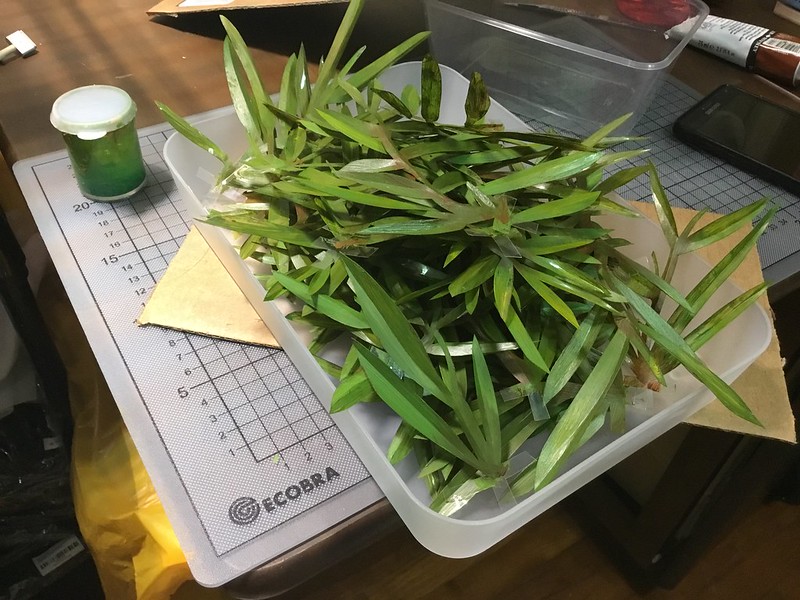
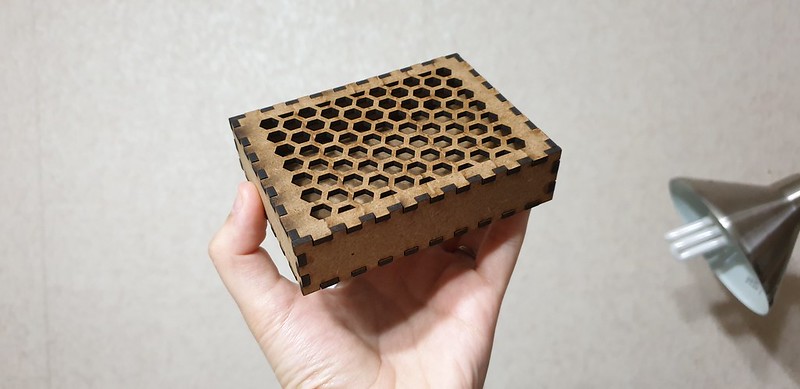
My basket of realistic fake cow grass


You can come to see the grass on the work I produced for the President's Young Talents 2018 show!

8Q @ Singapore Art Museum
8 Queen St, Singapore 188535
Gallery 3.12 (Level 3)
4 Oct 2018 - 27 Jan 2019